Coffee Brewing And Cupping
Coffee Brewing: Brewing a Dynamite Cup of Coffee
Coffee Brewing in an automatic drip brewer is America’s most popular brewing method, yet so many questions for dialing in a dynamite brew. There are very few automatic home brewers that are designed to create the ideal brewing time and maintain a constant temperature. More consistent results can be achieved through the use of a manual, pour over method where all of the elements can be carefully controlled by you. However, if you are looking for the best possible automatic drip brewer, finding one that can brew at between 195-205 degrees in no longer than 5 minutes is key. Too hot: bitters will leach from the coffee. Too cold: coffee will be THIN in color and possibly taste. Users control your grind level on drip makers to change the brew time. Coarse will be shorter, fine will be longer. If your contact time exceeds 5 minutes, it is possible that more of the bitters will leach out of the product.
As always, it is essential to start with clean equipment and freshly roasted coffee less than 30 days old, ground within 15 minutes of use. Typically, the coffee ground for use in an auto drip machine is medium to medium-course. Take the time to vary the grind and the filter (recommend natural paper) to dial in your perfect cup.
Brewing using immersion technics like French press or Aeropress produces a much different tasting cup with time and temperature being controlled by the user. For a French Press, coarse ground coffee is common to reduce the amount of grounds in your cup. For the Aeropress, Black Powder recommends finer and medium ground to easily push down the plunger. In either immersion technic, a shorter wait time will result in a sweeter cup. Recommend 2.5 minutes in the French Press and 1 minute in the Aeropress (check out the Aeropress Timer App for some interesting process changes that really impact flavor). But, customer should play for some light roasted coffees may like a shorter period while a darker roast may need an extra minute in the bath.
Kcup for Keurig doesn’t mean you have to buy the expensive kcups that lack flavor and taste – sorry for my sarcasm; we have never had a great cup of coffee from a pre-packaged coffee kcup. Using finer ground fresh roasted coffee, a mesh kcup can be used to generate a pretty good cup with the convenience that most Keurig owner crave. In non-Keurig 2.0 machines, load the finely ground grinds into the cup and press it down with your thumb to compact the grinds and slow down the brewing time to allow more contact time of the hot water with the grounds. With the Keurig 2.0, using the STRONG setting allows the brewer to slow down with pulsing water and makes a better cup. Since Black Powder has discontinued out iFill technology Kcups, we still offer a refillable cup. This refillable option can be used with 38% more coffee to create a dramatically better cup.
The most common question at The Roastery: How Many Scoops?
It makes more sense to think in terms of weight rather than scoops, especially taking into account the variety of sizes in which a “coffee scoop” is available. The industry recommended ratio of ground coffee to water for drip brewing is approximately 7 grams (roughly 1 rounded tablespoon) ground coffee per 5.2 oz (150 ml) of water, though many will find this to be quite a strong brew. You will want to measure the water yourself separately as the cup measurement lines on each machine are different and often do not represent any standard measurement. Many coffee machines consider 6 oz as a cup, while some others consider 5 oz as a cup. We don’t know what happed to 8 oz equals a cup.
The Specialty Coffee Association of America (SCAA) Golden Cup brewing fundamentals provide additional guidance (might be a little strong for the novice coffee drinker):
| Water | Coffee | |||
| Cups(6 oz) | Cups(8 oz) | Ounces | Grams | Tablespoons |
| 1 | 0.75 | 6 | 9 | 2 |
| 4 | 3 | 24 | 36 | 8 |
| 6 | 4.5 | 36 | 54 | 12 |
| 8 | 6 | 48 | 72 | 16 |
| 10 | 7.5 | 60 | 90 | 20 |
| 12 | 9 | 72 | 108 | 24 |
The Water
Other than the coffee itself, water is the most important ingredient in a cup of coffee. Water makes up more than 97.8% of what ends up in our cup. With this in mind, it is easy to see why it is so important to use quality, filtered water whenever you are brewing coffee of any kind. Carbon filtration is a minimum to remove any unpleasant flavor, like chlorine, while still allowing desirable trace minerals to remain in the water. The use of reverse osmosis, deionized or distilled water is highly unadvisable, as the goal is not to strip the water of all possible minerals. The coffee oils bind to the minerals present in our water and thus carry the flavor into our cup. According to SCAA guidelines, brewing with water that contains 50 -100 parts per million of dissolved minerals will produce the best tasting cup of coffee. Without the presence of the mineral traces, the cup will taste flat which is why we do not use distilled water.
The Filter
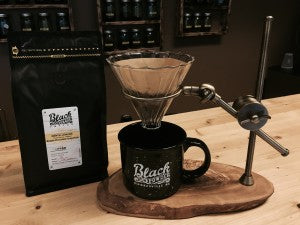
Paper filters are obviously the most popular choice. The resulting cup is sediment free and this clarity is part of the appeal for many drip lovers. Paper filters will also filter out and absorb key aroma-containing coffee oils while often lending their papery flavor to the finished cup. The flavor issue does vary from one filter to the next. Black Powder always recommends a natural filter and the cone coffee maker filters produce a better cup than a flat filter system. You can also eliminate any of the papery flavor by wetting the filter before brewing in a pour-over cup.
The Finish
After all of this careful preparation, it is easy to ruin a perfectly brewed pot of coffee by leaving it on a burner. As soon as your coffee is finished brewing, pour it into an insulated, preheated, tightly sealing carafe, if your machine does not already brew directly into one.
After brewing, it is important to thoroughly clean all of the parts of your coffee maker. Periodic cleaning with coffee equipment cleaner (or even a white vinegar) is also a good idea. Not only will it thoroughly remove any traces of coffee residue, but will also remove any scale buildup inside your machine to assure your boiler temperature is maintained.
Cupping:
True to tradition: take a white or clear glass cup and fill with 11 g of coarse ground coffee. Add 8 oz of water at the right temp. Smell the coffee as it blooms over the next 4 minutes. With a cupping spoon, use a soup spoon if you don’t have one, break the crust which is the grounds floating on the water to make a hole (do not stir). Tilt spoon inward to cup to get coffee not grounds. Sip with great velocity and pizzazz to allow air and coffee to hit your taste buds providing optimal exposure onto your taste buds. Let coffee sit on tongue and notice the taste differences on the front vs back of tongue and on the roof of your mouth. Spit cup is ok to use so you can cup more coffee without a caffeine buzz. Wait 2 minutes and try again, repeat. Rank the coffee.
Pour-over is our preferred using 11 g of coffee per 8 oz of hot water. This allow novice’s to try coffee without the complexity of cupping with grounds jumping into the sipping spoon. Coffee will change in flavor slightly from 160 F (really hot cup of coffee) to 120 F (medium hot). Try initially by smelling the aroma while brewing and before that first sip. Then take a sip about 2 minutes later and again 2 minutes after that.
There is a companion form called a Taste Profile sheet to help communicate your likes and dislikes….and be a coffee snob with your friends.
Discover more coffee terminology
More About Us: